


- We search a Template for Joomla! 1.5.x, for example “DMZ Blogger” and make a copy of the template folder.
- We edit the structure file
- We edit the file "templatedetails.xml"
- We add a "error.php" file also (copy it from a J! Copy 2.5.x template, for example from the Atomic Template).
- We add a picture of the tempate: template_preview.png (640x480 Pixel).
- We edit the "index.php" file of the template.
- We install and test the template
And when everything was done correctly, it works – for normal ;). For more complex templates it could be that we have to make precision work. But usually it is fastly done. If you want to do all 1 to 1 – no problem – here is the template DMZ Blogger for Joomla! 1.5.x and also the changed version, under Joomla! 2.5. executable.
DOWNLOADS
Step 1 – duplicate template folder
On our local server we have a Joomla! 1.5.x installation. There we install the template normally from the backend. Now I duplicate the whole template DMZ folder which can be found in the /templates/ folder. In my case I will copy / paste the "dmz_blogger" folder and rename it "dmz_blogger25". This will now be the directory containing the files we modify now. (see figure 1)

Step 2 – editing the files structure
First we will explore the directory "dmz_blogger25" with the file and remove the file "params.ini" – which is no longer needed in Joomla 2.5.x! Now lets copy the "error.php" file in the current folder. If we do not already have a error.php file we can copy it from the default and already installed Joomla! Template "Atomic ". At least we make a screenshot of Joomla! Webtemplate and cut the screenshot to the size of 640 x 480 pixel, save it as PNG in the template directory "dmz_blogger25" Joomla! 2.5.x) and rename the picture in "template_preview.png". This picture will be shown in the backend in the extensions manager / templates page.
Step 3 – editing the file "templatedetails.xml"
Now we edit the file "templatedetails.xml", so that it will be accepted by Joomla! 2.5. The following commands must be changed:
- install
- name
- filename
- params
The following entry can be deleted:
- params.ini
But we will go on step by step...
If you want to change an very old template, it could be that the DOCTYPE is not available – like in our example. So we have to add it manually but it is not a big thing. Please check if the DOCTYPE entry exists in the "templatedetails.xml" file or add it like it is shown in this example:

Enter the following line:

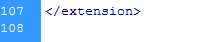
and also do not forget this : the command <extension> in line 3 must be closed at the end of the file like this:
Afer this lets go one step further and look at the install command. In our copied version of the template the command "install" looks like this:
We need to replace this code <install> with <extension>
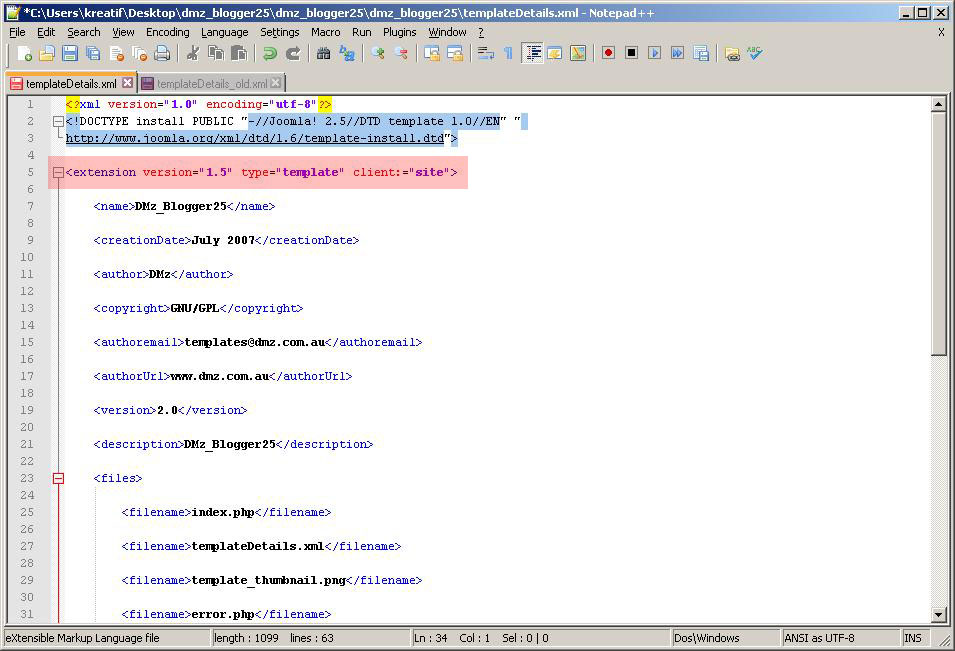
<extension> defines at first the version and than what kind of extension it is and at last the client (client: ="site" means frontend, client:= "admin" means backend)
... and of course do not forget to close the command correctly :)
HINT: the DOCTYPE command contains the string Joomla 1.6 – if you want to modify it correctly, change the entry to:
<!DOCTYPE install PUBLIC "-//Joomla! 2.5//DTD template 1.0//EN" "http://www.joomla.org/xml/dtd/1.6/template-install.dtd ">
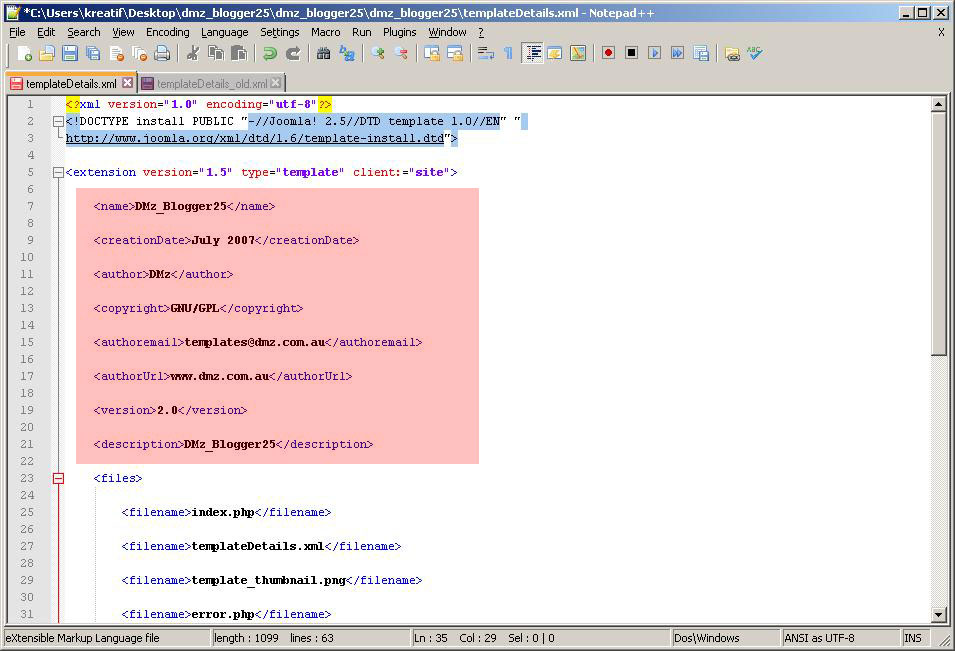
Here the new file is already adjusted in the screenshot. Now we will adapt the content below the "extension" command – template name, author, license etc.. Of course you can write whatever you want. The file looks like this after the changes:
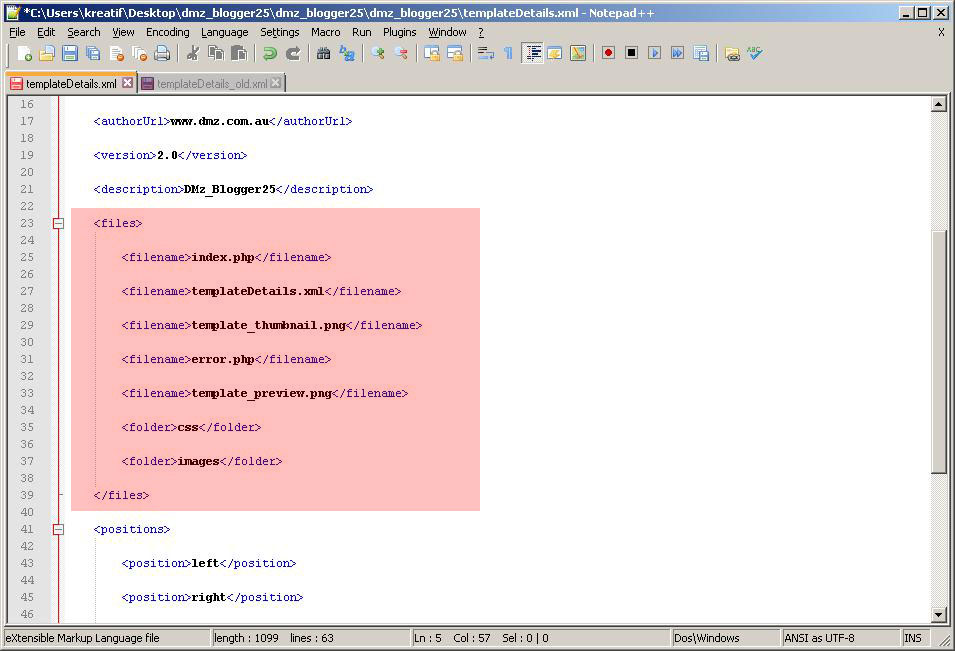
Now we will go on and modify the entries form the code line "files". In Joomla 2.5 it has been simplified to assign special files to the template. You do not have to name every file seperately that needs to be added – it´s enough to add the folder and all the files and subfolders contained in there will be stored and installed correctly – very simple!
We scroll down to the command "files" and delete all entries after the third line where you can find
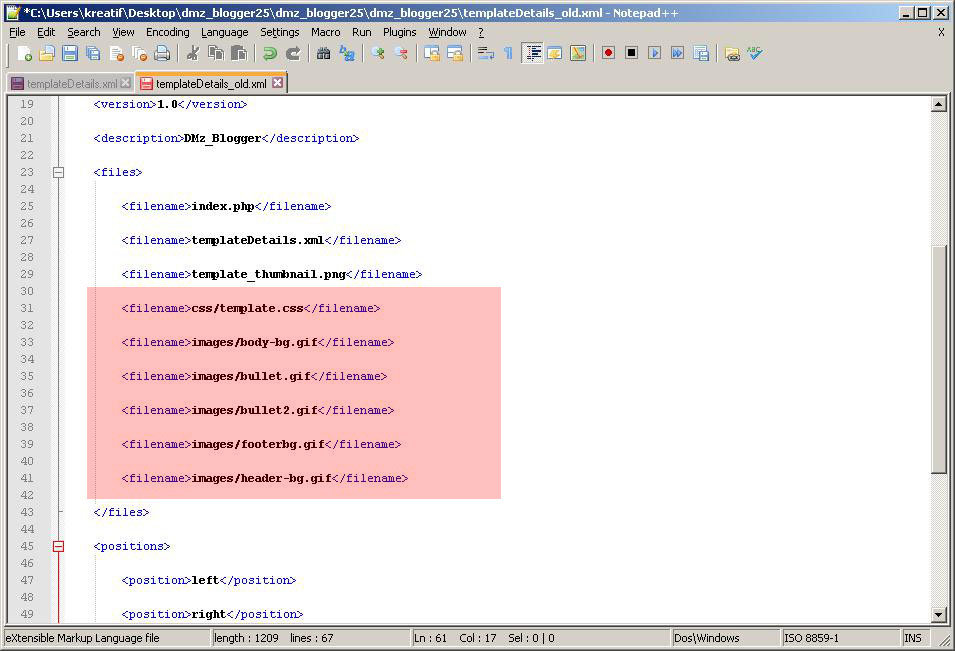
We delete the entries that are marked in the upper picture (lines 29 to 39) and than we add the following entries:
<folder>css</folder>
<folder>images</folder>
In our example template all CSS-files from the directory ...dmz_blogger25/css/xxx, and all pictures from the directory ...dmz_blogger25/images/blog/xxx do not need to be added. We simply add the css directory and the images directory - that´s all.
If you want to change another template than Dmz_Blogger, how it´s done in this tutorial, so do not forget to check out which directories are prsent in the templates folder ".../templates/name_eures_emplates/xxx" and include every directory with the command <folder>
For example it could be present the directories: admin, config, html, js, layouts, typhography, etc. The entries and closing tags need to look like this:
Next we cancel the entry...
<filename>params.ini</filename>
In our example template Dmz_Blogger this entry is not present, so here you can see a screenshot from another template where this file is present to help to you understand where it could be located if it´s present.
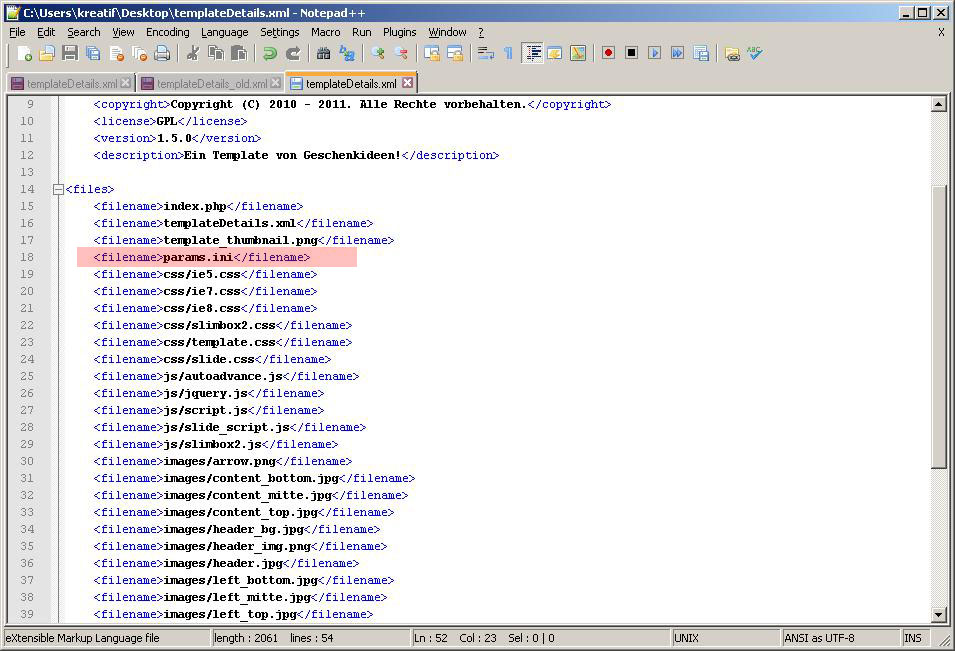
We cancel the whole line 18!
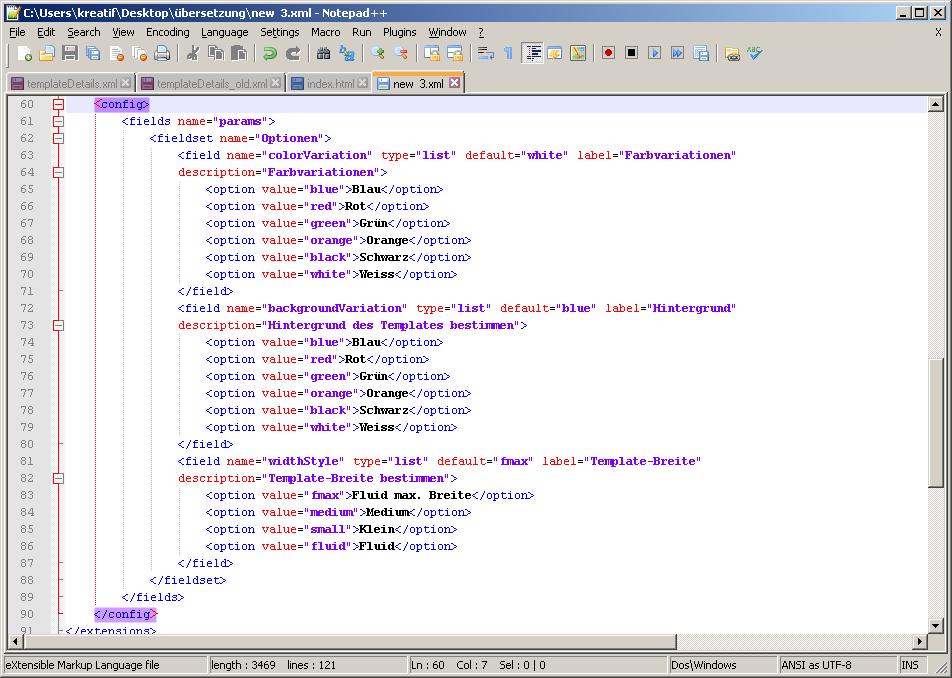
Now we will make the last change in the file "templatedetails.xml": we edit the entries within <params>.
Another new improvement of Joomla! 1.7 (and also for Joomla! 2.5) is the change of the command <params> to <config>.
With this new command we also get the possibility to assign the parameters of the template to groups, for example as for example colour, layout, etc.
In this example template are no parameters present. it seems that it has been choosen the wrong template – but no – this template has been choosed to demonstrate that also a very old template can be updated to Joomla! 2.5. Therefor it is shown again a picture from another template to help you to understand.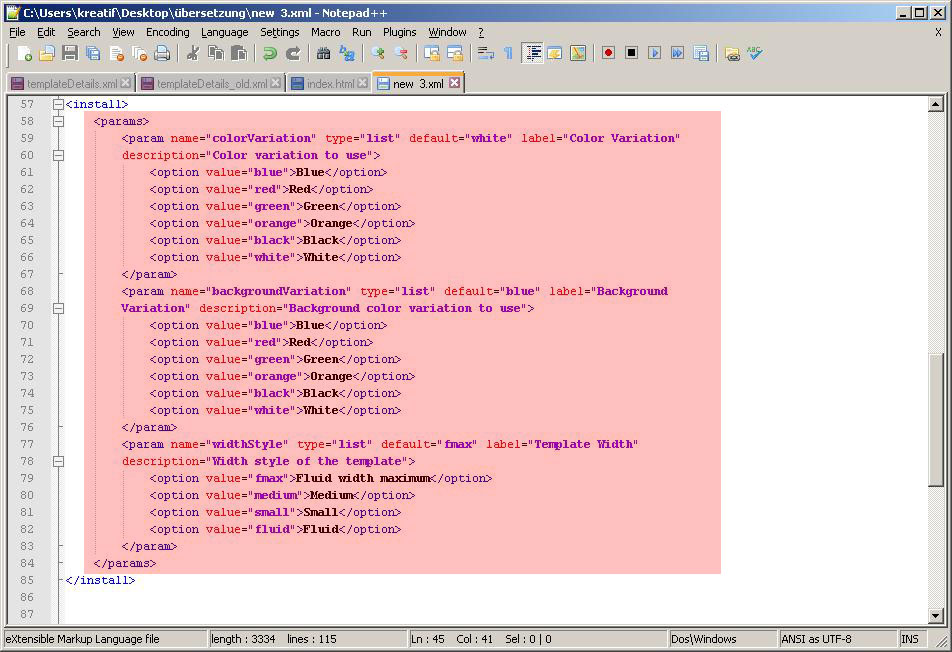
The entries marked in the upper picture needs to be replaced. So checkout line 75 to 98.
We write according to the above picture and new entries:
We are almost done! Checking out the file "templatedetails.xml" now, maybe you have the question: what about the module positions of the template? This will be also defined in this file!
The entries
We can go on to the next step.
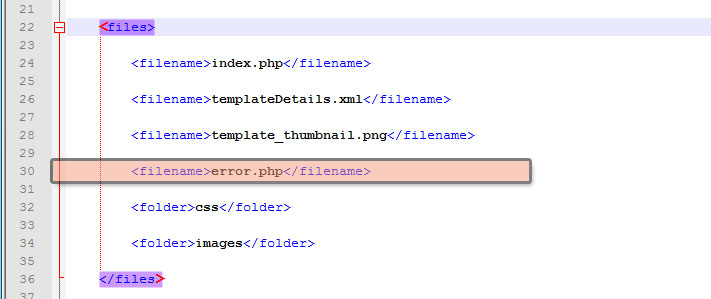
Step 4 – add the file "error.php" (for example from another Joomla! 2.5 template)
In our example of a standard-template. The templates of Joomla 1.6/Joomla 1.7 support a own error page but which doesn't know our adapted template. That are we doing now.
The templates from Joomla! 1.5/1.7/2.5 support a custom error page - good! But for now our template does not knows about this file. We need to add this entry also.
In file "templatedetails.xml" we add the following entry:
<files>
...
...
<filename>error.php</filename>
...
</files>
That´all! Our file "templatedetails.xml"now looks like this (we have already copied the corresponding file in step 1):
Let´s go on tothe next step.
Step 5 – template picture preview
If we want to so see a template preview of our template in the backend under "Extensions -> Templates -> Templates" of our template we have to define a picture in the file "templatedetails.xml".
The picture size can be 640 x 480px, best in PNG. After the image is saved in our template folder with the filename "template_preview.png" we add the new entry to our "templatedetails.xml" file (in this tutorial we already saved the picture in step 1).
We add the file "detailstemplatesdetails.xml":
<files>
...
...
</files>
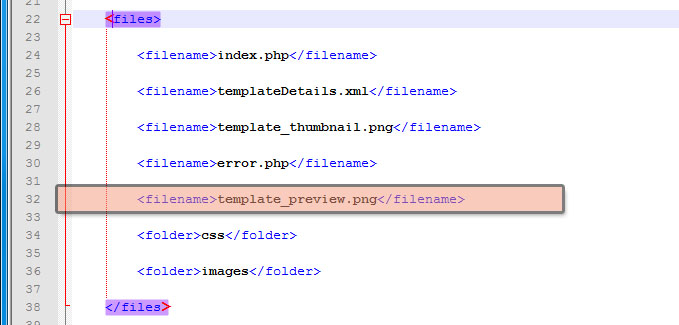
After this step the templatedetails file is ready, so we can save and close it.
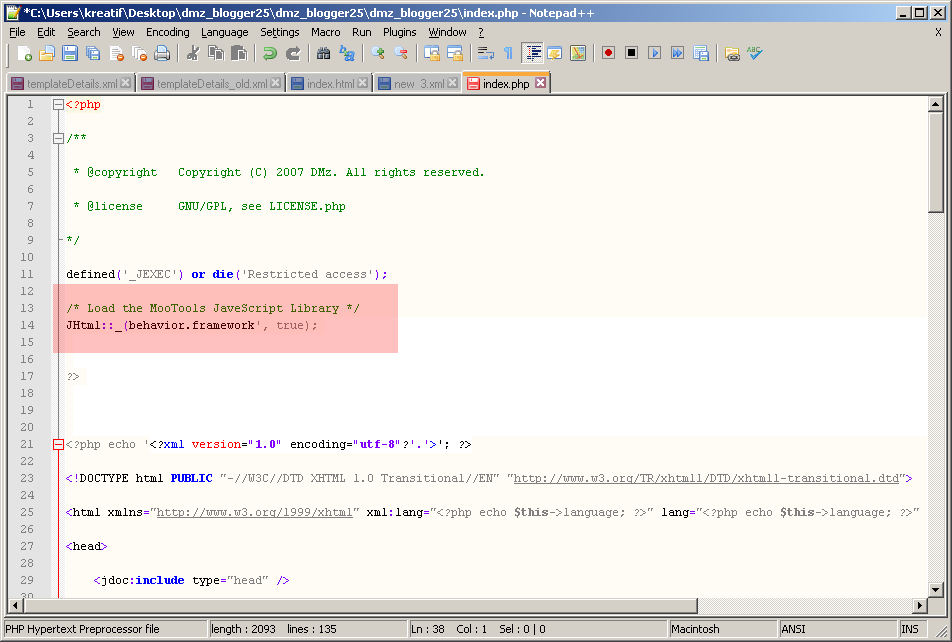
Step 6 - modification of the template file "index.php"
Also the "index.php" of the template must be modified. Not much has to be changed. The "MooTools Javascript library" has to be loaded and all links must be adapted to the new template name.
Loading the MooTolls Javascript library
We insert this command after the entry
/* no direct access */
defined('_JEXEC') or die;
befor the following... ?>
We add the following:
/* Loading of MooTools Javascript Library */
JHtml::_('behavior.framework', true);
The "index.php" looks like this:
Now we look how the links are called into the directory of the template. There are some different kinds possible. We have to correct something only when the command is defined as follows:

Then the directory /TEMPLATENAME/ has to be changed with the new name of our template. In our case...

Maybe it can also be that the template directory can be called with the command $this->template?/xxx
in the template var – so here we don't have to change something!
In our template it´s the same:

So we only have to add the "MooTools Javascript Libeary"... than we can save and close the "index.php" file"! Now to the last step!
Step 7 – install and test the templates!
Now we did all changes at the "new" Template and are finally able to install and test it!
At first we copy the whole folder in a Joomla!-2.5.x-installation and push in the backend to extensions.
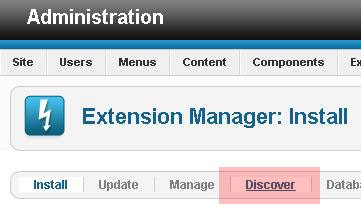
Now we click on discover
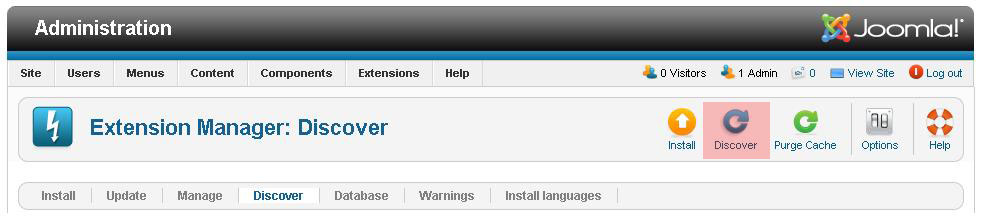
Than click again on "discover" (see hand in the picture) it searches about available components, modules, plugins an templates, which are available but are not installed "correctly"
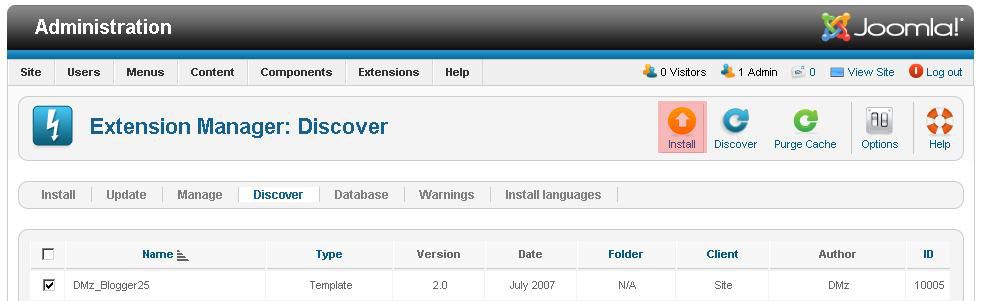
Our template "Dmz_Blogger25" has been located. We choose it click on "install".
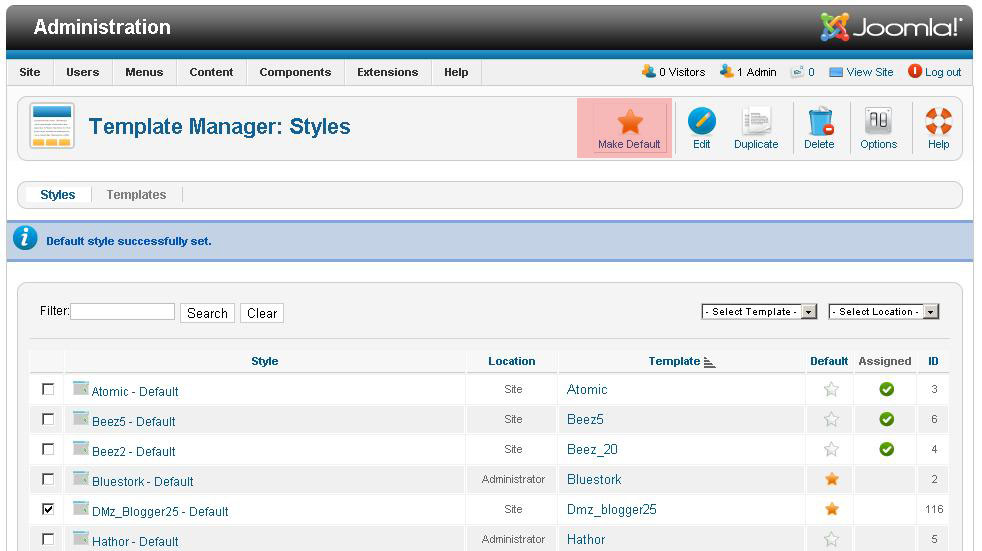
Afterwards we go to extensions -> templates and choose the installed template "DMu_Blogger25" and set it as standard.
We go to the frontend, make an update of the view and...
Here at this picture the right side is empty - because he did not configure with the left moduleposition!
We wish you much fun by changing templates and hope you are succcesful